

Helpful Hints
A collection of tips and tricks to help you with your entries.
Zoom In
By: Eric Scheur
Published September 18th, 2009
In this month's Helpful Hint, I would like to dig a little deeper into some ideas that can strengthen your workflow as a CG animator.
Workflow is one of those things that you get to experiment with, and it constantly evolves from project to project--sometimes from day to day. When you're just starting out, it can be daunting enough to try to get a decent handle on the technology, let alone understand how to wrangle it in a way that makes sense to you. Bit by bit, you start to feel more confident about this or that function, or how to use such-and-such tool with more consistent results. It doesn't really end, though: there are veteran animators who will tell you that they are still looking for a workflow that works best for them.
When it comes to developing your workflow, they key is to figure out where you could be more efficient than you are, and finding a good strategy to improve that area. I'd like to offer some suggestions from my own experiences. While my workflow is certainly not as well-defined as it could be, these are examples of things that radically changed the way I think about animating on a computer. I hope that these ideas will inspire your own workflow choices as well.
The over-all theme of these ideas is Zoom In, which is really just another way of saying the closer you get to the subject, the easier it is to work with. So if you're ready, let's get closer to our subject matter, shall we?
I'm going to start off with a demonstration using the graph editor. But first, there's a small test I want you to take. Below this paragraph you will find a white square with a blue dot in it. All you have to do is click on that dot. (note: nothing will happen when you click on it, this is just to check your eyesight and dexterity) Ready? Go!
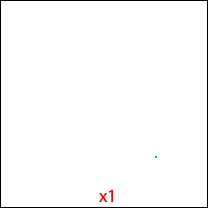
How did you do? My guess is that you either were a pixel or two off of the dot, or you spent quite a bit of time steadying your mouse hand, squinting your eyes, leaning towards your monitor with your neck held stiff, and making sure that nothing shook out of place when you clicked your mouse. In other words, it was neither very easy nor very quick.
Now, here's the second part of the test. The rules are exactly the same: click the blue dot. But this time, the square is shown at 10 times the size of the previous one. And..... go!
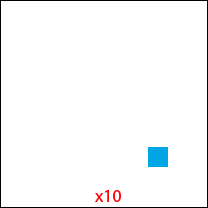
I'll bet you did a lot better this time. A lot quicker with less eye-straining, right? That's because, and I know this will be a shocker, it is easier to see and touch something that you're closer to!
Just to drive the point home, I also like this explanation from a friend of mine: imagine you're standing a foot away from a doorknob. Pretty easy to just reach out your hand and grab it, right? Now imagine trying to grab the same doorknob from across the room using one of those extendo-arm things they sell to change lightbulbs in high-ceilinged buildings. Standing so far away makes it much more difficult to do the job with any accuracy, right?
Now, let me tell you what this has to do with the graph editor.
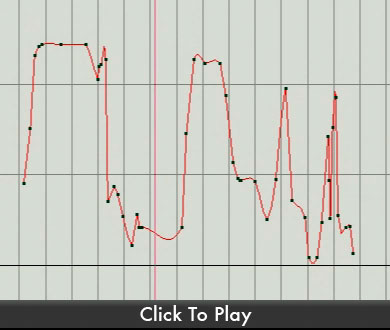
Let's say you're animating a hand doing a simple move up and down, and you are keeping your eye on your graph. It looks pretty good--like a good, smooth curve should look. Something like this:
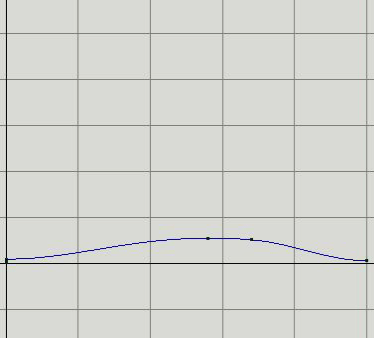
You say to yourself "Excellent. Looks fine to me, and so I'll move on."
But hold on, Buster! The truth is that if you were to zoom in on that curve, you would see that it might not be so perfect after all. Check out this video where we push in to see the curve up close:
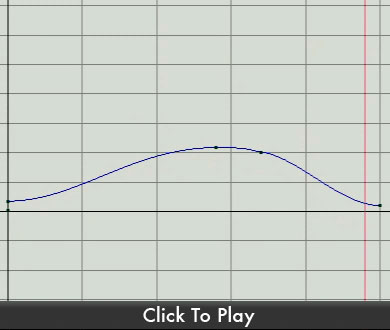
Now that we've taken a look up close, we can clearly see that there's a hitch in that curve. And while we're this zoomed in, it's a lot easier for us to tweak the tangents and make that curve as pretty and as smooth as we thought it was when we were way far away from it.
(Maya users: you can zoom the graph editor horizontally by holding down the Control and Alt keys while click-dragging with your Middle Mouse Button. Likewise, you can zoom vertically by holding down the Control and Alt keys while click-dragging the Right Mouse Button)
When I get down to that stage where I'm really ready to start polishing up my animation, I'll go in and look at each individual curve throughout the range of animation I'm working on. I'll run through it like it was a roller coaster, starting at the beginning and going straight through to the end, making sure that there are no crazy hitches. (and if there are, I fix them along the way) The process looks something like this:
(see if you can spot where the curve looks fine from far away but has obvious trouble when you see it in close up detail)
There's no shortcut to this part of the process. I go through each and every curve like this. I've found my work improved greatly once I started zooming in and getting up close with the graph editor.
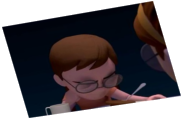
Now that we've seen how zooming in and getting up close can help us manipulate tangents in the graph editor, let's take a look at how to use this approach while posing your characters. Let's take the example of a character offering someone a flower. Like this:
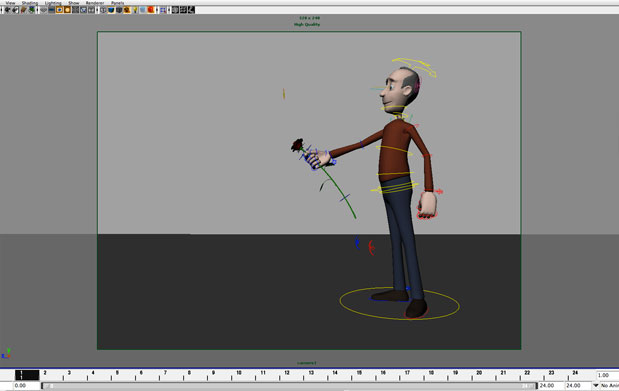
I want the hand holding the flower to have a natural and appealing pose, as well as a clear silhouette. I'll need to select each of the finger joints individually to rotate them to precisely the right position. The camera, however, is pretty far away and my computer screen isn't all that big to begin with. It's almost guaranteed that I won't be able to click on the desired finger joint on my first try. It's also unlikely that I'll be able to see the results of my teeny-tiny rotations in any meaningful way. Remember our boxes with the blue dots? The doorknob across the room? Same principle.
By now the solution should be obvious: Zoom in! Get up close with those fingers!
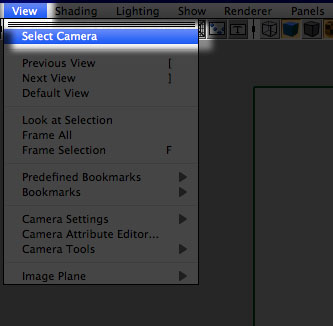
In fact, if you want to maintain the silhouette while you're zoomed in, here's a tip from my friend Matt Gaward:
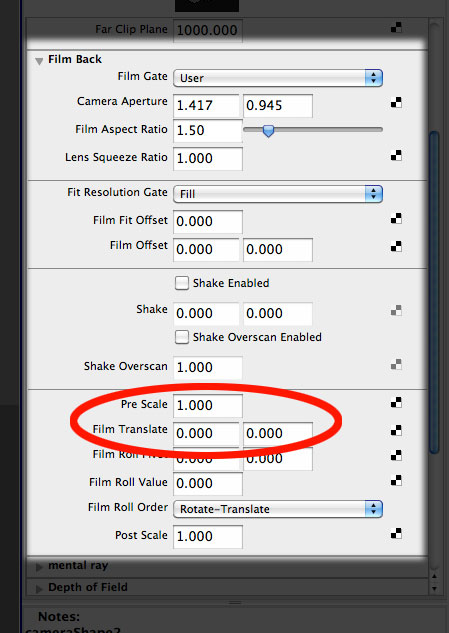
Using the above steps, you can zoom in temporarily, move around the scene as necessary working on fine details, and you don't lose the perspective. This method is great for working on any number of details in a shot--from intricate silhouettes, to facial work on a distant character.
In addition, Jean-Denis Haas recommends the "Zoomerator" tool, available at HighEnd3d.com. Thanks, Matt and JD!
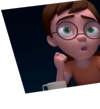
Now that we have our up-close camera, we can see that the hand looks like this:
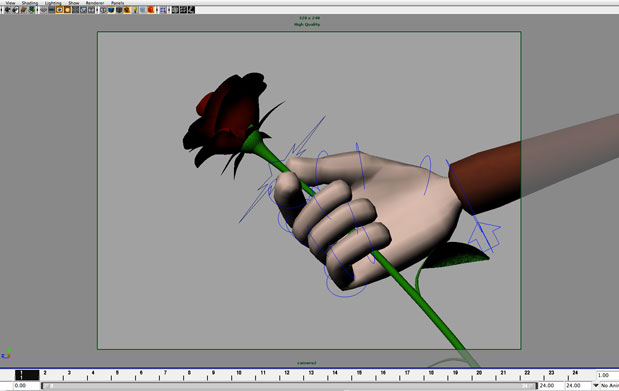
Now it's much much much easier to select the proper fingers and rotate them the exact amounts I want, and I can be certain that my pose will read with clarity and appeal.
I want to talk about another area where zooming in can be helpful. While not specifically related to workflow, this is likely to help the way you think about staging your shot and lead to better a more appealing composition.
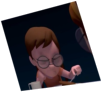
One of the most common things I see among many new (and some not-so-new) animators at the 11 Second Club is that they place their characters fully in frame. I think the notion is "I want the audience to see everything, including the character's feet, and their weight, and everything all around the character." The irony is that with characters so tiny in the frame, the audience can hardly see anything at all.
For example, have a look at the staging of this shot:
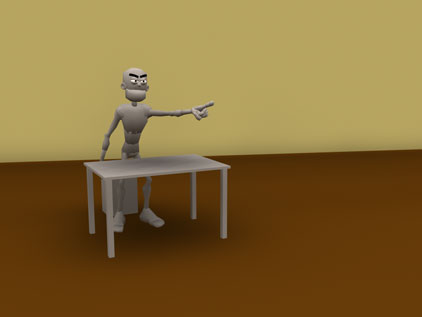
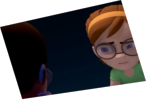
You almost have to squint to actually see what's going on, don't you? But without changing the angle at all, we can push the camera in and get the much more visually pleasing:
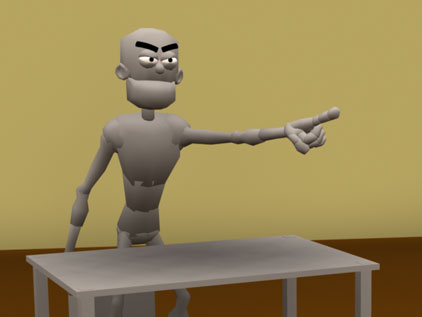
See? Now we can clearly see every move this character makes, and the zoomed in camera has given us a scene that is much more in tone with the intense anger this character is expressing.
For a more in-depth discussion of how this approach to staging can help your shot, be sure to read the Helpful Hint on Breaking Out
Finally, for one more application of the zoom in concept, check out Jason Schleifer's The Fear of Moving Past Blocking. In that article, he illustrates how zooming in on your timeline can really help you narrow your focus and fine-tune your workflow. Brilliant stuff.
Until next month, my friends! Happy animating!
- Eric
comments powered by Disqus