


Helpful Hints
A collection of tips and tricks to help you with your entries.
A Clean Start
By: Eric Scheur
Published August 28th, 2009
It's time to talk about one of my favorite subjects: Getting Organized.
There's this notion out there that "creative people" and "organized people" are made from very different building blocks. You can't be creative if you're restricted to specific boundaries and procedures. You can't organize a creative process that needs to be free to move as new ideas and fanciful little whims present themselves. Right? Wrong! (of course)
While there are artists who feel comfortable and at ease in a kind of "fog of creativity" (papers lying all over the place, unwashed clothes on the floor, seven empty cans of Red Bull scattered around the computer desk), there are just as many who find that a little structure can help them focus their mental attentions on all of the creative stuff since they know that other technical and outer-worldly concerns are straightened away and taken care of. Whether you're the former or the latter, or somewhere in between, you may find some of the following can help you put some order into your workflow. Ideally, these are things that should be done before you've animated a single frame, or drawn a single thumbnail. This will set the stage for the month of work you have ahead of you.
A quick note: All of the following is my own personal preference and you are encouraged to find a system that works for you. Feel free to deviate from my suggestions, or invent your own system. My hope is to inspire you see how a few small preparations in the beginning can save massive headaches later on.
Ready? Let's dive in!
Folder Structure
It's been my experience that most animators who work alone keep their files clustered together in a general animation folder, or sometimes straight out on the desktop. I used to work that way, too, and I remember the convenience of having everything all in one place. That is, it was convenient in the beginning. Once I had a few versions of a scene or several different walk cycle attempts, that one folder become more and more difficult to navigate. Plus, if I ever moved stuff around on my desktop, or placed one folder inside another, or renamed something somewhere, I'd encounter all sorts of error messages about missing files, references that couldn't be found, and audio files that no longer matched what my software was expecting.
My eyes were really opened up once I began working in a commercial studio, where animators access their files from a server that also supplies files to the modelers, TD's, riggers, and texture artists. It was no longer acceptable to name my files whatever I felt like at the moment ("trying_that_middle_part_again.mb" wouldn't cut it), or to make a new random folder ("new animation" doesn't quite work because a week from now, the name has lost its meaning). Folder Structure and File Naming Conventions were integral to a job moving forward efficiently.
Of course your home computer doesn't require a system as sophisticated as a fully-functioning studio, but you'd be surprised just how far a little organization can take you.
As an example, we'll pretend that we're going to animate a piece for the 11 Second Club. (I know it's a crazy example)
First, we're going to need a permanent and reliable place for our projects to live on our machine. Whether you're using Windows or OSX, your system has provided you with a "My Documents" or "Documents" folder (respectively). I recommend creating a sub-folder from here, and naming it "Animation."
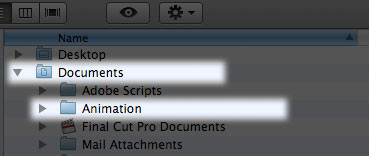
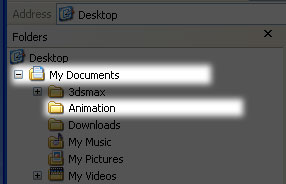
This is where all of your animation files will live from now on. If you'd like, you could even create another sub-folder called "11 Second Club," to distinguish your 11SC work from work you do for business, school, practice, or personal projects.
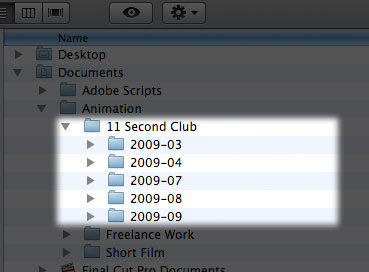
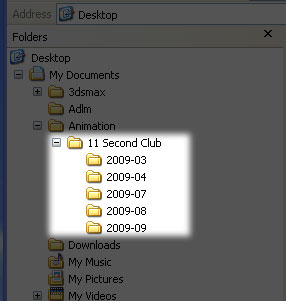
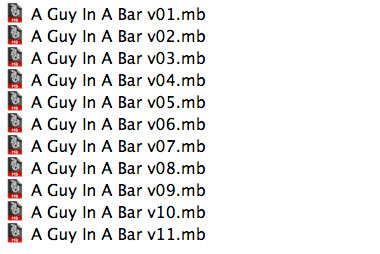
You can see that I've also divided my 11SC Folder into the different monthly competitions I have worked on. This may start to look over-organized, but after only a few months I find it much better than having just one folder that looks like this:
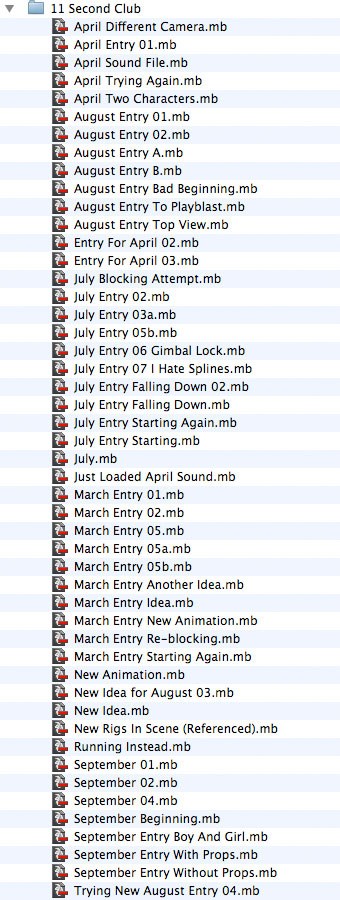
I mean, think of how long it takes to scan through those names in an "Open File" dialog before you find what you're looking for.
Now it's time to actually set up the folders for our project. If you're using Maya, you can use Maya's "Project > New Project" menu to automatically create a set of folders for yourself. If you're working with a different 3D Package, or working in 2D or stop-motion, it might be nice to set up your own folder structure. Here is a basic 3D setup that I recommend:
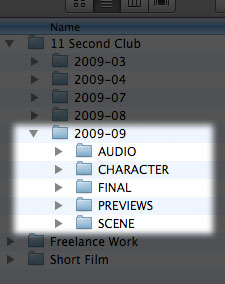
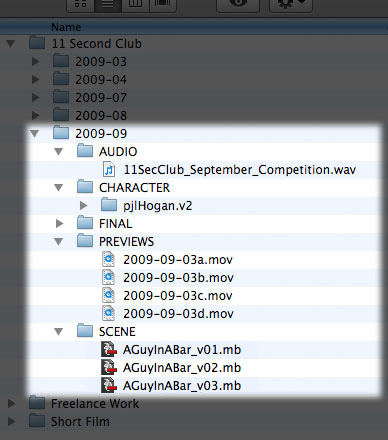
That should be enough to get us started. Depending on your needs, you may also like to create folders for RENDERS, POP-THROUGHS, REFERENCE, CHARACTER DESIGNS, THUMBNAILS, etc. The important thing is that we have all of these folders and files inside our one main project folder, which is inside our 11 Second Club folder, which is inside our Animation folder.
Naming Conventions
Before moving on, I want to talk about File Naming Conventions. That's a fancy way of saying "Call your files something that makes sense." You will almost always want to be able to tell, at a glance, which is the newest file. A good naming convention can also help you track your progress backward through a project in case you decide to make some changes to an earlier file. The easiest way to accomplish this is to choose one file name and save numbered versions of it as often as you'd like. For example, let's say we want to call our file:

The name indicates what will be going on the scene (there will be a guy, and he will be in a bar--natch), but to really prepare this file for the production process, let's modify it just a little:

Ah ha! That's more like it! I can now start saving versions of this file for as long as I'd like, and the computer will keep them organized for me. Weeks from now, instead of looking like this:
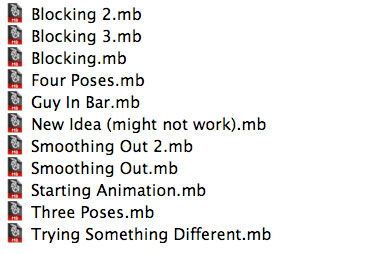
My folder will look nice and clean, like this:
I know what you're going to say: "But Eric! With that new filename system, I can't tell what changeshave occurred in each file. The good thing about the previous method is that it was like taking notes on what stage I was at. I could tell whether I was still blocking the scene, or starting to smooth the first twenty frames, or adding eye darts. You've taken that away from me."
Oh, but hear me out, doubting animator. There is nothing preventing you from adding extra words after the version number if you'd like to. Like this:
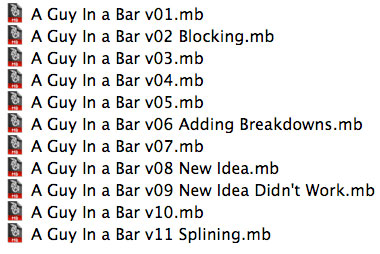
The value of doing things this way is that you not only get those little reminders to yourself about what stage of animation you're at along the way, but the files are still nice and neat in chronological order because of the way the computer keeps things alphabetized. What's more, you can almost get a sense of your workflow when you look back at those notes later on. As long as you keep those the same string of letters and numbers at the head of the filename, everything is is automatically taken care of for you.
Note to Maya users: Maya allows you to save your scene files as either .mb (Maya Binary) or .ma (Maya ASCII) file types. .mb files are the default, and help keep file sizes small. However, you may want to consider using .ma files, which can be opened in a text editor to locate and troubleshoot any technical problems that might crop up. Many studios prefer using .ma files for this very reason.
The First File
Once all of our assets (our audio file, our rig file, any props we'll be using) are safely organized into their appropriate folders, it is time to create our first scene file. Our Version 01. Whether we decide to import,merge, or reference (techniques which are beyond the scope of this article) objects and characters into our scene, the important thing is to start clean. Our Version 01 file should have all of the pieces in place, but no poses on the character and no keyframes on anything else. This way, we will always have an untouched version of our scene should anything unthinkable happen during the course of the month. There will always be this file to come back to.
Once Version 01 has been saved, we can save Version 02 of our file and really get to work!

But we're not ready to animate just yet. There are a few small tasks to take care of before we can finally put all of this preparation work out of our minds.
Just Five More Steps
Note: The 11 Second Club has no rules about what frame rate its entrants must work at. You may work at 24fps, 30fps, 25fps, 12fps, etc. Ideally, however, you will choose your frame rate at the beginning of your project and not change it down the road.
Note: You may find yourself changing the timeline quite often as you work (especially if you follow the advice in Jason Schleifer's Helpful Hint), but it is always good to keep in mind the full number of frames you'll be rendering out or making a preview of at the end of the month.
This is the screen configuration I use 98% of the time:
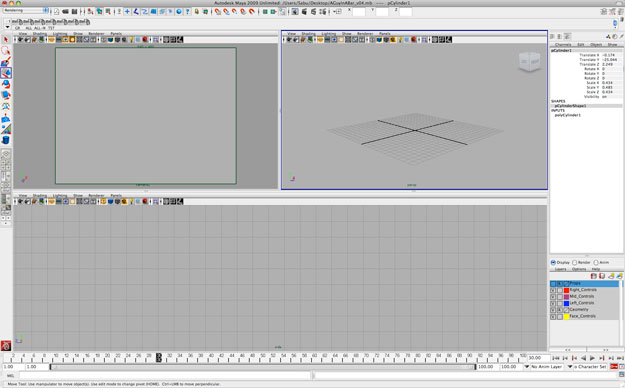
In the first pane, I keep my camera view. I lock my camera so that this view never changes. I turn on this viewport's Safe Frames (or Resolution Gate) so that I know the ratio of my final output, and what will appear on screen. Once this is all set up I will always have this pane to refer to while I'm animating, and I will be able to 'animate to the camera' with certainty every step of the way. If possible, I will turn off the visual display of all controls and any other non-character elements in this viewport so I will have as close a representation of my final render as possible.
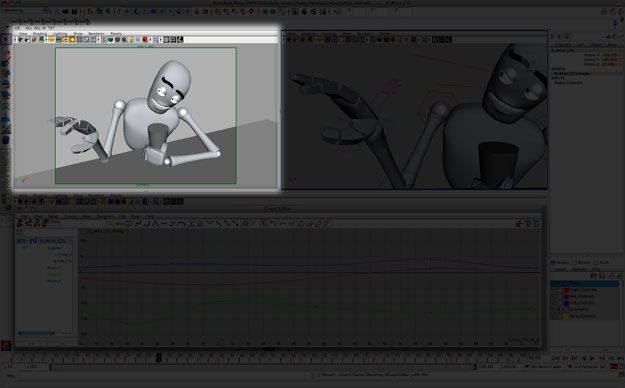
The second pane is where I do most of my actual animation. I keep this pane in Perspective mode most of the time. This allows me the ability to rotate around a character, zoom in close, select what I need, move and rotate body parts as I please, all without disturbing the camera view. Occasionally I will turn this pane into a Top, Left, or other orthographic view, but for the most part I stay in Perspective and it is all I need to navigate around, select controls, and manipulate my character.
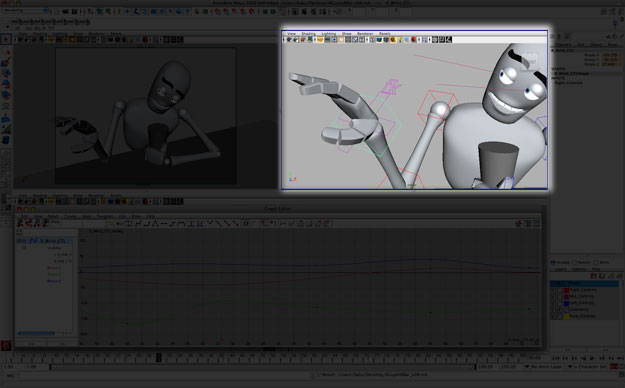
The bottom pane is one long stretch of screen real estate that tends to stay unused while I am blocking--although it can be useful to have a long Side Orthographic view if your character is walking, for example. Where this part of my screen really start to get useful is when it comes time to deal with the Graph Editor. With this long space, I have enough room that I don't have to worry about the Graph Editor edging over into space I need for my Perspective and Camera views, and I have the perfect stage to look at my curves (which I believe are most intuitive in a lengthwise view).

Again, this is merely the way I am most comfortable working. I have seen different screen configurations with almost every single animator I've watched, and everyone seems to have their own reasons for why they like their screenspace set up a particular way. The key is that they do have a reason for working the way they do instead of just using the default layout that the software presents them with out of the box. Experiment and think about what works best for you, and make sure your viewports are set up in a way that will be most productive for you.
And now, with all of this organization finally behind us, we are ready to tackle our new animation scene. So let's get to it, eh? There's only so long before the deadline at the end of this month. See you there!
- Eric
comments powered by Disqus